Hello – My name is Bruce Shortz, I’m the principal behind the Albuquerque, New Mexico based, 10000 Cranes Studio.
My primary business is printing for photographers and artists (also shooting original artwork for digital output).

Bruce’s studio located in Albuquerque, NM
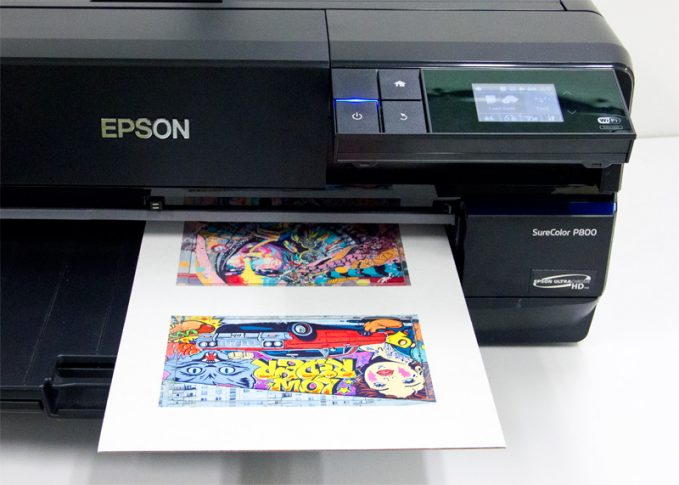
I’ve been doing this for 15+ years. My studio has two 44” printers, one a Canon IPF 8300 the other an Epson 9900.
I shoot artwork with a Mamiya AFD III with a Leaf digital back. I’m also a “fine art” photographer – engaged for 45+ years in that endeavor.
WHY I CHOSE TO PRINT ON METAL

“Mime” – by Bruce Shortz
For the past year I’ve had a precipitous decline in printing (on paper) for photographers.
My observations visiting photography galleries, attending art exhibits and art fairs, plus talking to clients and other photographers, is that photographers all seem to think that unless a photograph is printed on metal – it doesn’t count.
Preposterous of course, but let’s not let reality get in the way.
Being in the Southwest means that a lot of shooters here seem to think that the only things worth photographing are cactus and lizards. A lizard on a cactus is a fine thing. Printed on metal it’s even finer. I shoot neither.

From a series called “Angels”, printed on rice paper – by Bruce Shortz
Despite my misgivings about all of this metal printing, I’m still a capitalist at heart. That means that I don’t like to see a decline in sales and I’m always ready to do something about that.
Investigating how to move my clients and others from big photo labs to 10000 Cranes Studio, led me first to look at Dye Sub equipment and materials.
I wasn’t willing to invest that much money just to do metal prints and I really didn’t want to move into the t-shirt and lunch box business. That led me to face mounting prints to acrylic.
To me, a vastly superior product to dye sub metal prints, which lacked resolution. Apparently the lure or perhaps better said, the allure of metal is the gooey wet-look. Acrylic has that with high resolution.

“Lisbon”, printed on Breathing Color Metallic paper – by Bruce Shortz
I purchased a 55 inch laminator from one vendor after doing a great deal of research, only to discover that it would not properly do the acrylic process.
I painfully shipped that thing back to the vendor and purchased another 55 inch laminator. That was the ticket. I was in the acrylic business.
Shortly thereafter, my favorite paper vendor, Breathing Color, announced Allure Photo Panels. Wow! That would be easier than face-mounted acrylic prints.
And all I needed was a laminator and (uggggh!) a way to cut the panels. Laminator. Check. Metal cutter. Ouch.
Their recommendation for a 600-1000 lb piece of equipment (shear) that would occupy a third of my space was putting a damper on things.
I called a ‘metal-guy’ here in town and he said, “…hell, I’ll cut ‘em for ya!” (Think cowboy talk).

I could build that into my expenses / price formulation. Further investigation of that led me to the Fletcher FSC Substrate Cutter.
THE FLETCHER FSC SUBSTRATE CUTTER

The Fletcher FSC Substrate Cutter is more expensive than a shear, but it has vastly more payback opportunities: I was paying for precut dibond panels to back my acrylic, plus precut acrylic – both of which I was paying extra to have the edges routed for a smoother finish.
Plus I was purchasing foam core, gator board and other materials in sizes I could handle. The Fletcher allowed me to cut all of those materials here with an edge that required no further finishing.
The Fletcher cuts Aluminum, di-bond, Sintra, gator board and other plastics – effortlessly. I should have purchased one of these years ago.

I have installed this unit as a wall mount. I will further add, that it is easy to assemble and easy to wall mount. I’ve been purchasing all of my materials (aside from Allure Photo Panels) in 4×8 sheets, which provides substantial savings.
Additionally, payback to me is also being able to offer other products and services. I’m printing on Breathing Color 1560 (260MT), which is my favorite paper, mounting that to either foam core or gator-board and over-laminating with a luster finish.
Gorgeous product – All with the aid of my laminator and my Fletcher cutter. My studio features these as 44”x44” pieces that I explain, “…they are less expensive to frame as they need no glass or acrylic in the frame.”

While I’m on equipment, another piece that’s needed in this process is a ‘corner rounder’.
Y’know, the way people here make a right or left turn on the street and instead of a 90 degree turn it’s more like a 20 degree turn.
Well, that’s what you need to do with your metal prints. Round those corners.
ALLURE AQUEOUS METAL PRINT WORKFLOW

I’ve recently set all of this up to do metal prints, modified my website to announce it and am working on the competencies necessary to offer this service.
I’m getting this down pretty tight and will probably modify to some degree as I continue doing this. I can confidently say that printing on Allure Photo Panels and finishing it, is an easy process.
Not too labor intensive, easy to set up and execute.
I print with a RIP. I use ImageNest and have a preset for Allure. I follow BC’s instructions / guidelines for the preset and find that all works as it should.
My first print on Allure was not good. I sent Michael Flannigan a photo of the serious banding that had occurred and he recommended a +20 adjustment on ‘paper feed’.
Following his expert advice, I made the suggested correction and printing occurred perfectly. I do want to add that I’m not using a profile for this product.

I know this is printer heresy. I’m letting the printer manage the color rather than Photoshop manage the color.
I will say that the Epson driver is actually very good at rendering perfect color with my calibrated Eizo CG277 monitor.
I know this flies in the face of printing orthodoxy – “Always use a profile,” however, it’s not always true.
It’s easy enough to install the Allure sheet following prescribed Epson routines for sheet feeding. I will admit to some trepidation about putting metal into my 9900, however, after the printing I have now done – I have no concerns whatsoever.
LAMINATING AND TRIMMING

Following printing – I’m ready to over-laminate with a gloss laminate. I use a ‘sled’ for this routine.
I web up the laminator, run a leader board in and once the laminate is tight and smooth – I run the DRS-1 (blue guy) over the Allure Photo Panel to remove any dust/debris/contaminants. Then run the print through the laminator at a medium speed with “moderate” pressure.

Now the panel is ready to be cut. I love my Fletcher.
With the laser guide and the various cutting tools, it makes cutting simple, easy, effortless and precise.
It’s that easy.
CLOSING THOUGHTS

In conclusion, printing on Allure Photo Panels is simple to master and is superior to products offered on-line.
There is an enormous opportunity to bring, what has been mostly an online retail, purchasing event, into your shop and get a decent ROI.
There’s no reason why customers have to go on-line when services can be provided locally at less or the same price with superior results.
If the reason for purchasing Allure is for your own benefit, i.e, being cheaper than on-line or elevated quality control – well, laminators, cutters, corner-rounders, etc. – you do the math.
To further illustrate my Allure workflow, you can check out my video below (no animals were hurt during the filming of this project):
- Fletcher FSC Substrate Cutter: I purchased from School of Sign Arts. Teresa was a gem to work with and this is the lowest price on the internet.
- Kala Laminator: I purchased from Rolinx in Texas. The US Distributor. Frank Romanello, is probably one of the most knowledgeable people in the US on the operation of laminators.
- Sooper Rounder: I purchased this from Kent Walker at Walker Supply Company. Lowest price on the internet.
- DRS-1: Dust Removal System. I purchased the ‘General Purpose’ roller, the blue one, directly from SDI, Inc. This is essential equipment in lamination.
→ Want to try out Allure for yourself? Click here to shop Allure and start producing metal prints today!


2 thoughts on “Bruce Shortz on Allure and the Fletcher FSC Cutter”
Hi, great article, really enjoyed it and the video. Wandering if you could advise on you choice(s) of laminate (gloss)? I want to personally try this process but at this time the product from Breathing Color is only available in 51″w rolls, way to large and expensive for me at this time.
Thank you
Jules
Hi Jules,
Actually any brands of cold laminate with any format of roll laminating machine would work for your purposes. Any further questions please let us know. Thanks.